'94 Range Rover Classic LWB
A history of the rover is detailed below. Everything from welding, transmissions swaps, and bolt on's have been listed below. All of the work was performed by myself.
 |
The Range Rover was purchased new in 1994 by my father. I remember him driving me to football practice before I even knew how to drive. I was fortunate enough to be given the vehicle when I began driving. I quickly realised the potential for the vehicle and joined SCLR (Southern California Land Rover), a club devoted to the responsible off-road use of land rovers. |
|---|---|
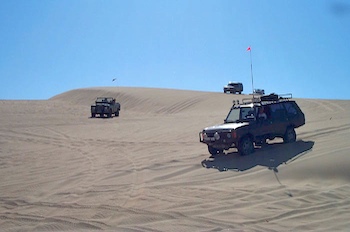 |
SCLR taught me many things about respect and responsibility of one's vehicle. I was the youngest member of the club, I think I was 17 when I joined! Here we have my Range Rover, a Series III, and a Discovery off in the sand dunes of Pismo Beach. This photo was taken by John Lee, a fellow member and the owner of a beautiful Defender 90. |
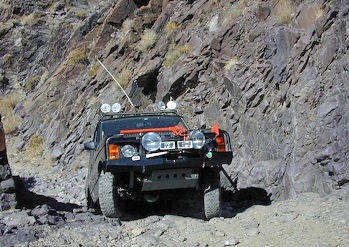 |
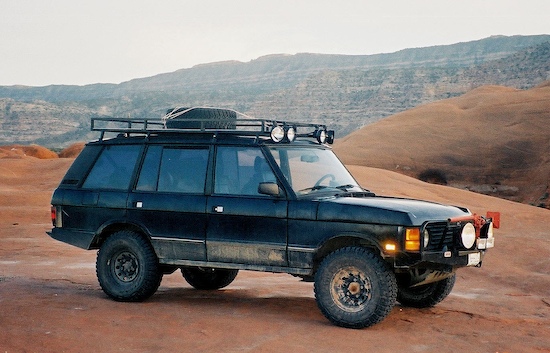
A trip to Death Valley brought deep into the canyon's stradling the California/Nevada border. Clearly the rover was no longer in stock form. A strong bumper, hi-lift, skid plates, lights, CB radio, and tires had been added. I had also replaced the stock air suspension with more reliable coil springs. All the work was performed by myself, which proved to be a real learning experience. |
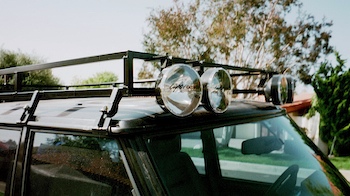 |
The second roof rack I made, featuring LightForce lights. The lights are from Australia and are focusable like a MagLight flashlight. |
 |
I taught myself how to weld. My first project was this rear bumper, made from a medley of sources. The bumper is not terribly attractive up close, but it has done it's job well. I vowed to make all of my welding projects look alot better.. |
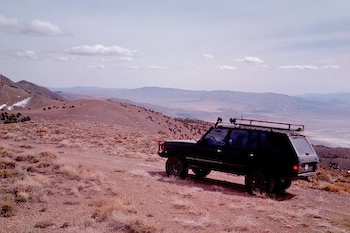 |
A trip to the old town of Cerro Gordo atop the White/Inyo range brought a new perspective for the possibilies of adventure and travel. I realised that planes and passports weren't necessary for great adventures. |
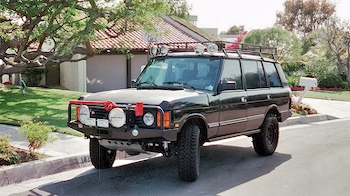 |
All waxed up and ready to fend off the elements. Now visible is a roof rack I welded. A dramatic improvement over the previous. Also visible are the rock sliders I made to protect the door sills. They also serve as jack points for the high lift jack. |
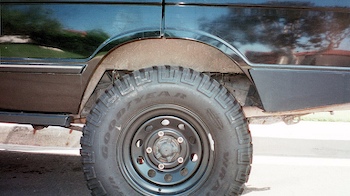 |
New wheels and tires were also aquired. The old BFG Mud terrains were horrible, the new Goodyear MTR tires were a dream. The wheels are from Rover Accessories. Cad plated lug nuts are nice choice to prevent rust. |
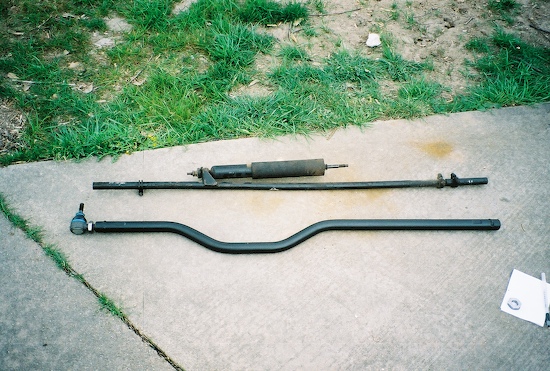 |
After beating up my stock steering arms on all of my adventures, I realized I needed to replace them before I destroyed them. The top is old, the bottom is new. The new unit is several times stronger and is the "high clearance" version. This unit is made by Rover Tracks. The steering stabilizer was relocated to the drag link (not pictured) also made by Rover Tracks. |
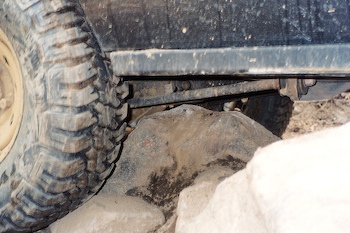 |
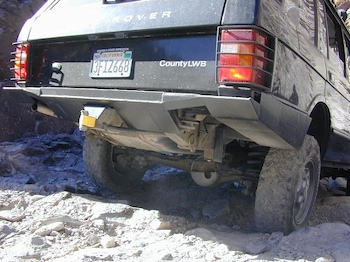
Here we can see a classic situation for folding a trailing arm. I stopped before causing any damage. The stock trailing arms shown were soon replaced with stronger units from Rover Tracks. Also visible are the rock sliders, which have received a tremendous amount of use. |
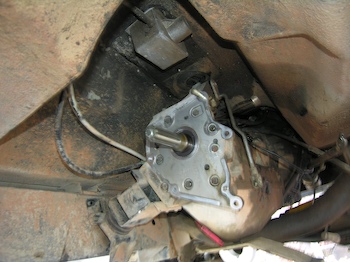 |
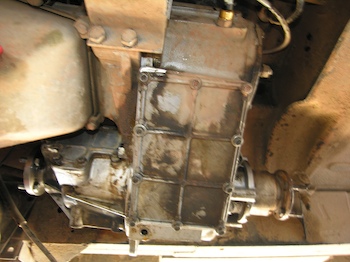
HMM. Something is missing, the transfer case. The goal of this project was to replace my worn out Borg Warner transfer case with a used LT-230 out of a well cared for Discovery. Here we can see the back of the ZF4HP22 automatic transmission. For this install, the output shaft of the auto box had to be replaced. The entire driveline was lowered in the rear to fascilitate the removal of the old transfer case. |
 |
The old Borg Warner unit, faithful service for 193,000 miles. Now sitting in my storage unit...want it? The main reason for the change is that the BW unit is chain driven, and weak at high mileage. Rebuilding the BW unit would cost more than replacing it with a gear-driven LT-230. Cheaper, stronger, and whole lot of work... |
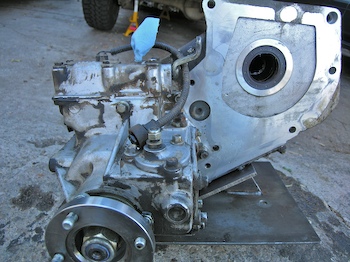 |
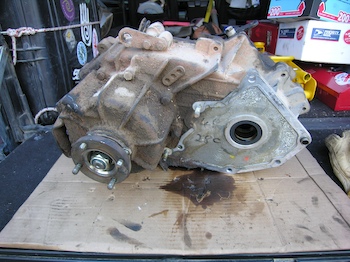
The "new" unit, after plenty of cleaning. A new input seal seal was installed, as well as the seals on both front and rear drive outputs. The LT-230 is bolted to a jack adaptor, to allow me to properly lift the unit up to back of the transmission. The new case would require the following in order to be installed: output shaft, seals, shift linkage, front driveshaft, parking brake assembly, right side gearbox frame mount. |
 |
Ok, the "new" transfer case has now been installed. Getting to this stage took me about 4 days of work. Temps were hovering around 30 degrees throughout the project... Not pictured is the parking brake debacle, which was solved with a used unit taken off a 2002 Defender from England. Land Rover parts are truly world travellers, living different lives, in different places, for different reasons. |
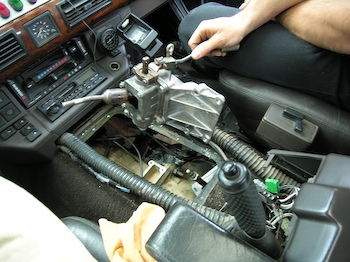 |
My friend Charles is shown holding my "new" shifter aquired from Roverland Parts. This came from a discovery. The old shifter cannot be used as it has an "I", 2-position pattern. The new transfer case requires an "H", 4-position pattern. The new shifter was of course frozen and would take us the better part of an afternoon to break free and get working properly. After installing, the unit was thoroughly packed with grease and a bit of 90 weight. |